Build a Personal AI System on Your Computer · Personal AI Systems Essentials
Setting Up Your AI Agent
Get your AI agent running
From Idea to Realization
Installing OpenClaw is where your personal AI system stops being an idea and starts running on your hardware.
So, by the end of this lesson, you'll have OpenClaw installed on your Mac, your AI model connected, and a working chat session open in your browser. Your AI will be alive — ready for the next step.
Let's go!
Step 1: Download the OpenClaw App
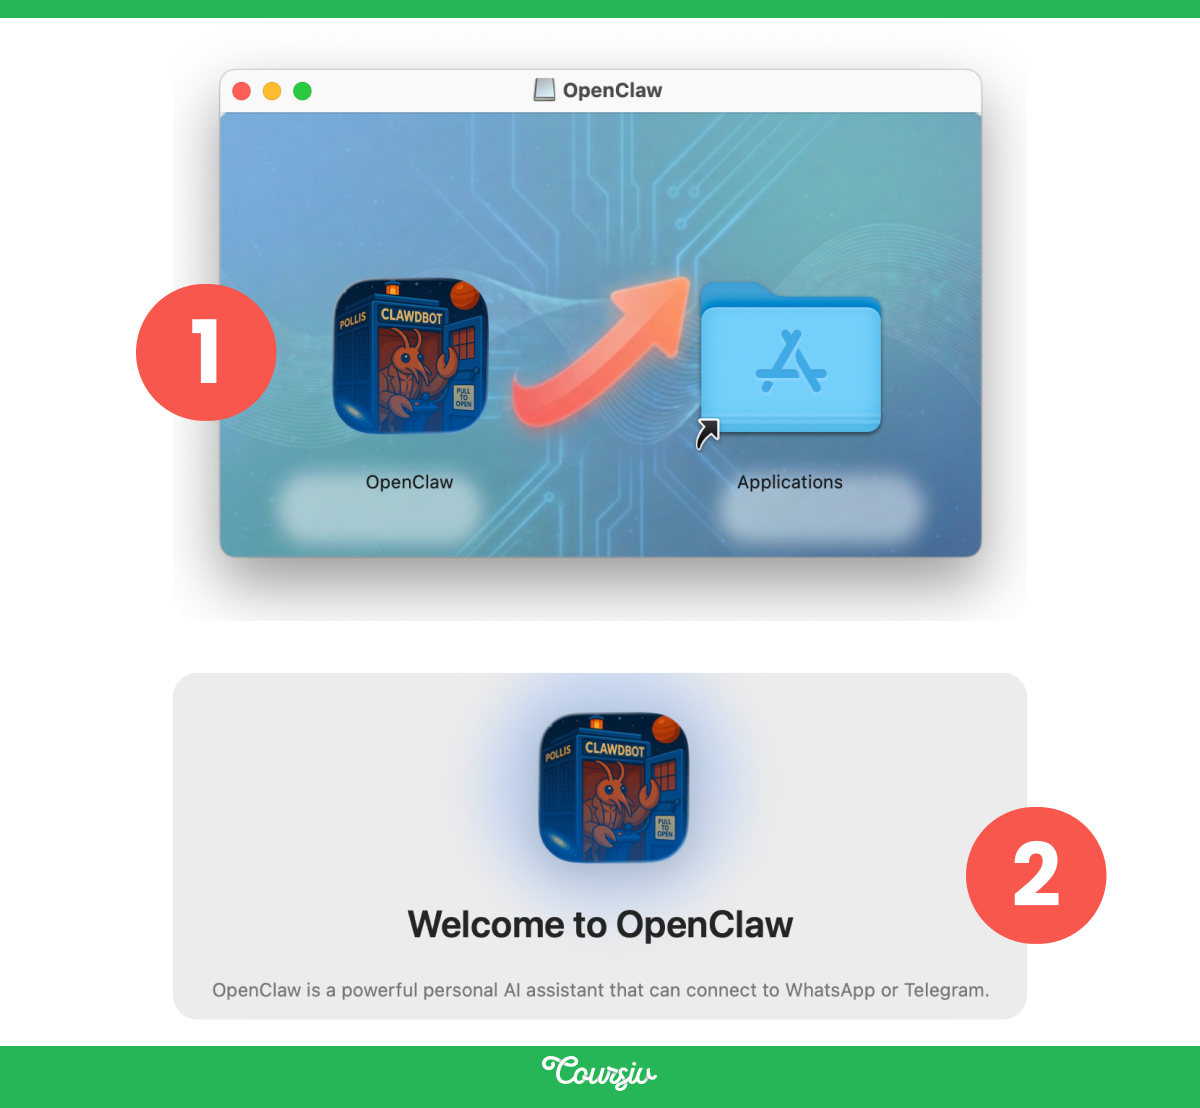
Go to openclaw.ai in your browser and download the OpenClaw app for macOS. Once it downloads, open the file and drag OpenClaw into your Applications folder — the same way you'd install any Mac app.
Then open it from your Applications folder or Spotlight. The first time you open it, macOS will show a warning asking if you're sure you want to open an app downloaded from the internet. Click Open.
The First Permission Prompt
Right after that, macOS will ask if OpenClaw can find devices on your local network. Click Allow.
This is the first of several permission prompts you'll see during setup. Each one unlocks something specific — none of them are there for no reason, and none of them share anything with anyone outside your Mac.
Step 2: The Setup Wizard
Once the app opens, you'll see the OpenClaw setup wizard. This is a guided flow that walks you through everything in one go — model provider, permissions, workspace, and gateway.
The wizard tells you what each step does before you do it.
Local vs Remote
The first real choice the wizard asks is where your Gateway runs — on this Mac, or on a remote machine elsewhere.
Choosing This Mac is the right choice for everyone starting out.
Step 3: Permissions
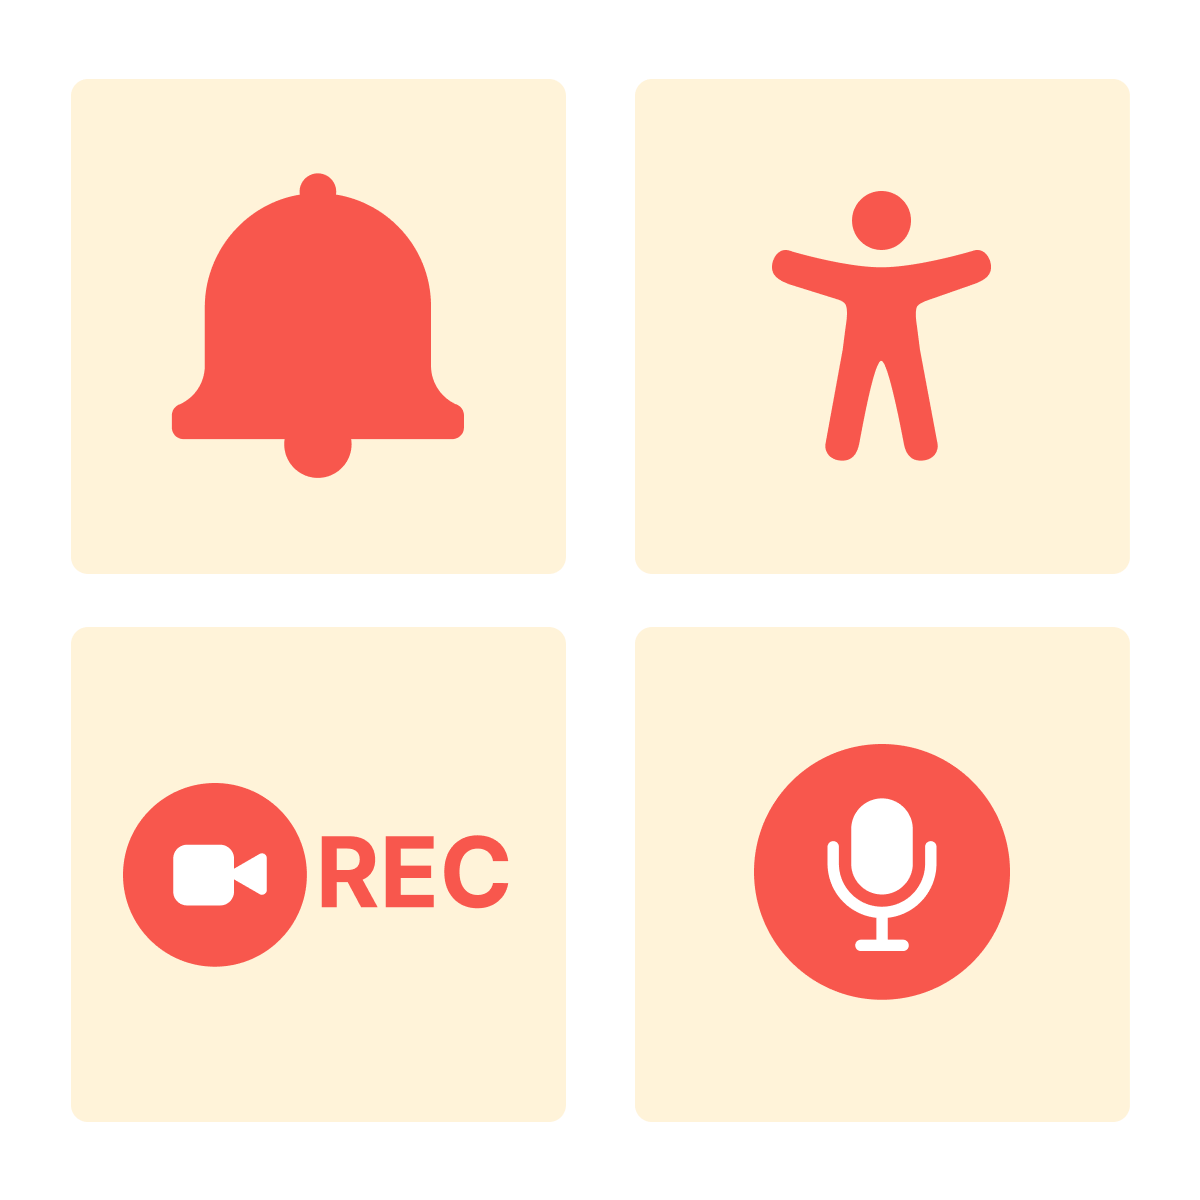
Next, the wizard walks you through a permissions checklist. You'll see prompts for several things — notifications, accessibility, screen recording, microphone, and others.
Grant each one — next, we'll discuss what each one actually does.
Notifications
This lets OpenClaw alert you on your Mac when something needs your attention — a completed task, a question from your AI, or something that needs a decision. Without this, you'd have to check in manually.
Accessibility
This allows OpenClaw to interact with apps on your Mac on your behalf — clicking, reading content, navigating interfaces. It's what makes automation possible. Without it, your AI can think but it can't act.
Screen Recording
This lets OpenClaw see what's on your screen when needed — useful when you ask it to help with something visual, review a document, or check on a running process. It only captures when actively being used for a task.
Microphone and Speech Recognition
These allow OpenClaw to process audio if you send a voice message or ask it to handle audio content. You don't need to use these features right away — but granting them now means you won't hit a wall later.
Step 4: Your Model Provider
This is where you paste the API key you prepared previously.
The wizard will ask you to choose a model provider and enter your key. Select Anthropic if you're using Claude, or OpenAI if you went that route. Paste your key into the field provided.
The wizard validates it on the spot. If it works, you'll see a confirmation and move on. If it doesn't, double-check that you copied the full key with no spaces at the start or end — that's the most common reason it fails.
Step 5: Your Workspace
The wizard will set up a workspace — a folder on your Mac where OpenClaw stores its memory, instructions, and context files.
The default location is fine. Leave it as suggested. You'll get to know this folder better in further lessons when you start personalizing your AI.
Step 6: Install the Background Service
Near the end of the wizard, you'll be asked whether to install the background service.
Say yes. This is what makes OpenClaw start automatically every time your Mac starts up. Without it, you'd have to manually open the app after every restart.
The Menu Bar Icon
Once the wizard finishes, look at the top right of your screen. You'll see the OpenClaw icon sitting in your menu bar.
Click it. You'll see the Gateway status — it should say running. That's the confirmation that OpenClaw is alive and working in the background.
Step 7: Open the Dashboard and Send Your First Message
The wizard will offer to open the dashboard — a simple browser-based chat interface that lets you talk to your AI directly from your Mac.
Open it and type anything. What you're doing here is confirming that the connection between OpenClaw and your AI model is working end-to-end.
When your AI replies, that's the moment. Everything is connected. Your Mac is running an AI that can think, respond, and act.
The dashboard isn't how you'll use OpenClaw day to day — that comes in the next lesson when you connect your phone. But it's the fastest way to confirm the setup is working before you go any further.
practice preview
Interactive practice
Put in order
You've just been through the full install flow. Put these steps in the right order.
If Something Goes Wrong
The most common issues at this stage are straightforward.
If your API key is rejected, copy it again from your provider's website and make sure there are no extra spaces. If the Gateway shows as not running in the menu bar, click the icon and look for a Start option. If the dashboard won't open, try restarting the app from the menu bar.
Most problems at this stage have a simple fix. Don't restart from scratch before trying the obvious one first.
What Comes Next
Your system is installed and alive! Next, you'll make it reachable from anywhere by connecting OpenClaw to Telegram or WhatsApp — so instead of chatting through a browser on your Mac, you're messaging your AI from your phone like you'd message anyone else.
That's when the real magic starts to happen. See you soon!