Canva AI · Introduction to Canva AI
Video and Motion Generation
Animate a still image into a moving clip
Video and Motion Generation
Most people assume professional video content requires a full production pipeline, but with Canva AI's Video tab, the whole production process gets easier.
In this lesson, you'll use it to animate designs, add voiceover, and export for any platform.
The Common Mistake
When most people first try to generate video content, they type something like "a video of a cat." The result comes back generic: no movement direction, no tone, or structure.
Choose one
Why do you think a vague prompt like "a video of a cat" produces an unfocused result?
So the problem with "a video of a cat" is that it's a category, not a clear set of directions. Just like the Design tab, the more specific the input, the more usable the output. Let's see that in action.
Text to Video
The Video tab is a paid feature in Canva Pro that generates short clips based on a text prompt. Describe the subject, action, setting, and tone, and Canva AI builds the clip around those details.
practice preview
Interactive practice
Fill in the blank
Complete the prompt below to generate your first video clip.
Here's what you got: a simple, short clip generated straight from your prompt.
Great, now if you want to change a detail, Canva AI's built-in settings let you go further. Style, Ratio, Audio, Framing, and Lighting can all be adjusted to make your prompt more structured and the output better.
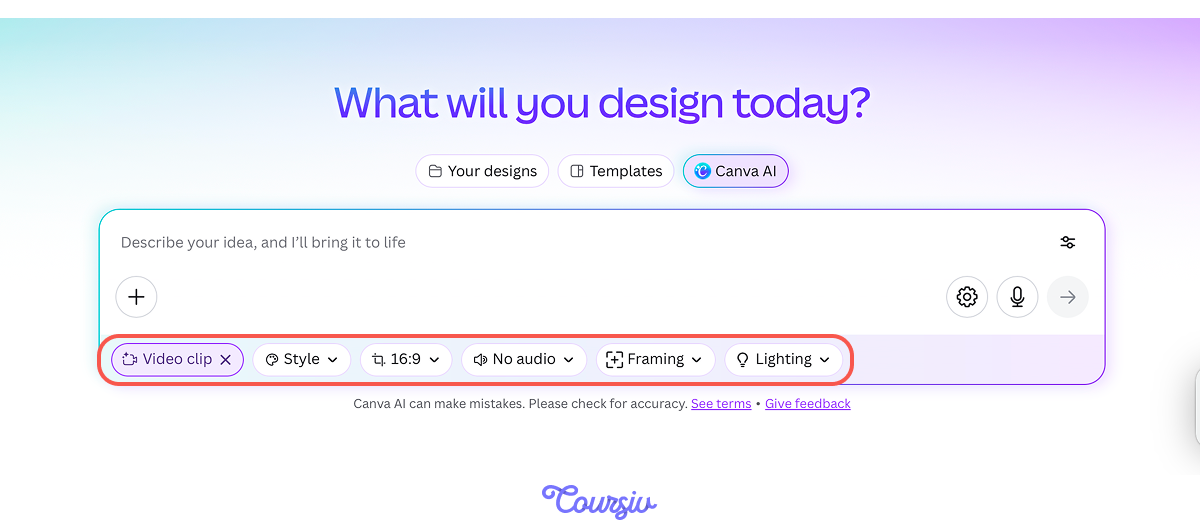
Try it with a specific setup: a cartoon version. Select Cartoon style, Medium Shot framing, and Soft Lighting in the settings panel, and see what changes.
practice preview
Interactive practice
Fill in the blank
Complete the prompt below to generate your clip with a distinct style, shot framing, and lighting.
Here's how it looks with the same prompt, but with settings applied.
Choose one
You generated two clips with the same prompt — one with settings, one without. What made the difference?
You've generated and customized your first clip. But there's still one thing we haven't tested — what happens when you make the prompt itself more specific. Let's find out.
Specific vs. Vague
The settings panel shapes the visual style, and the prompt itself controls what happens in the clip. Subject and action are a start, but setting and tone are what make the difference between a clip that could be anything and one that feels intentional.
practice preview
Interactive practice
Fill in the blank
Take the same subject and action, and add a setting and tone to see how the output changes.
You added the same subject — but with a setting and tone, the clip now has a specific mood and atmosphere.
Image to Video
A setting and tone in the prompt turned a generic clip into something with a specific mood and details. Now, take the process one step further and animate something that already exists as an image.
Upload a photo or generate one in the Image tab first, and Canva AI turns it into a moving scene — the original image becomes the first frame, and the motion builds from there.
practice preview
Interactive practice
Fill in the blank
Generate an image to use as the base for your animation.
Now, once you have an image, let's upload it to the Video tab and animate it into a moving scene.
practice preview
Interactive practice
Fill in the blank
Take your generated image and animate it into a moving clip.
See how the still image turned into a moving scene with just a slow camera drift.
AI Voiceover
Canva AI doesn't stop at visuals; it can also bring your clip to life with a voice, too.
Once your clip is ready, AI Voiceover assigns a synthesized voice to a typed script and syncs it to the video timeline in the Canva Editor. You can record a voiceover yourself or generate one with AI.
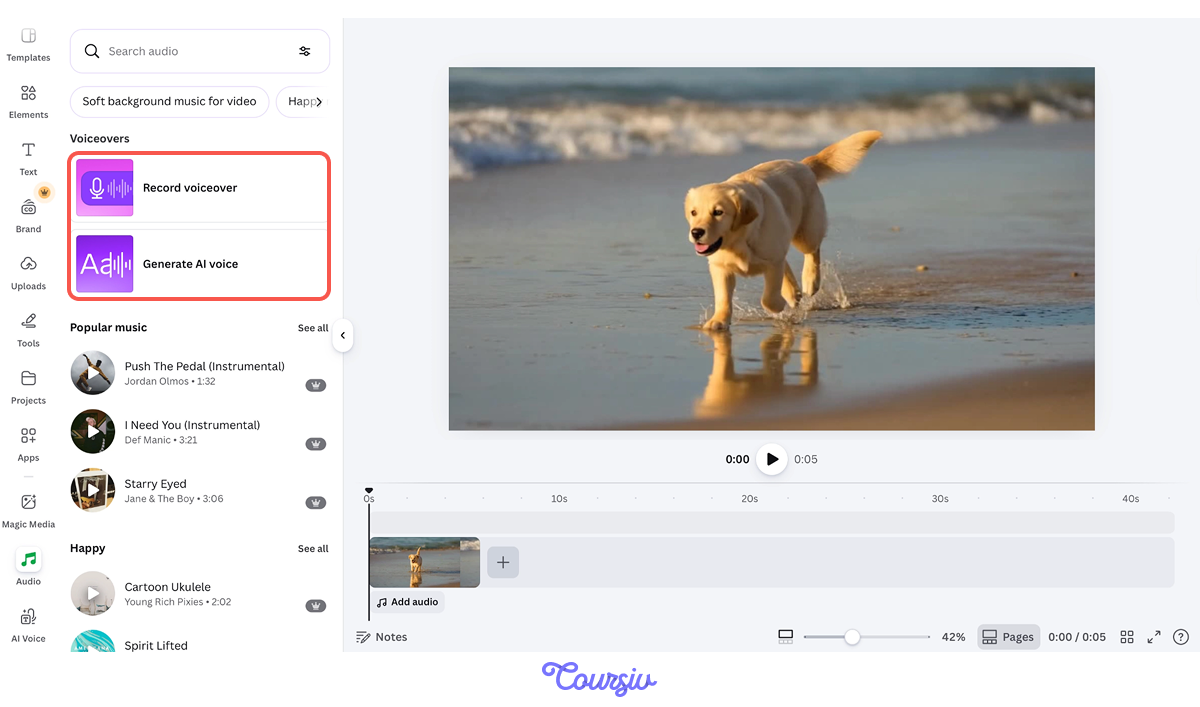
Type the script directly into the voiceover panel under Enter text, select the voice that fits the content, and Canva AI places the delivery against the clip.
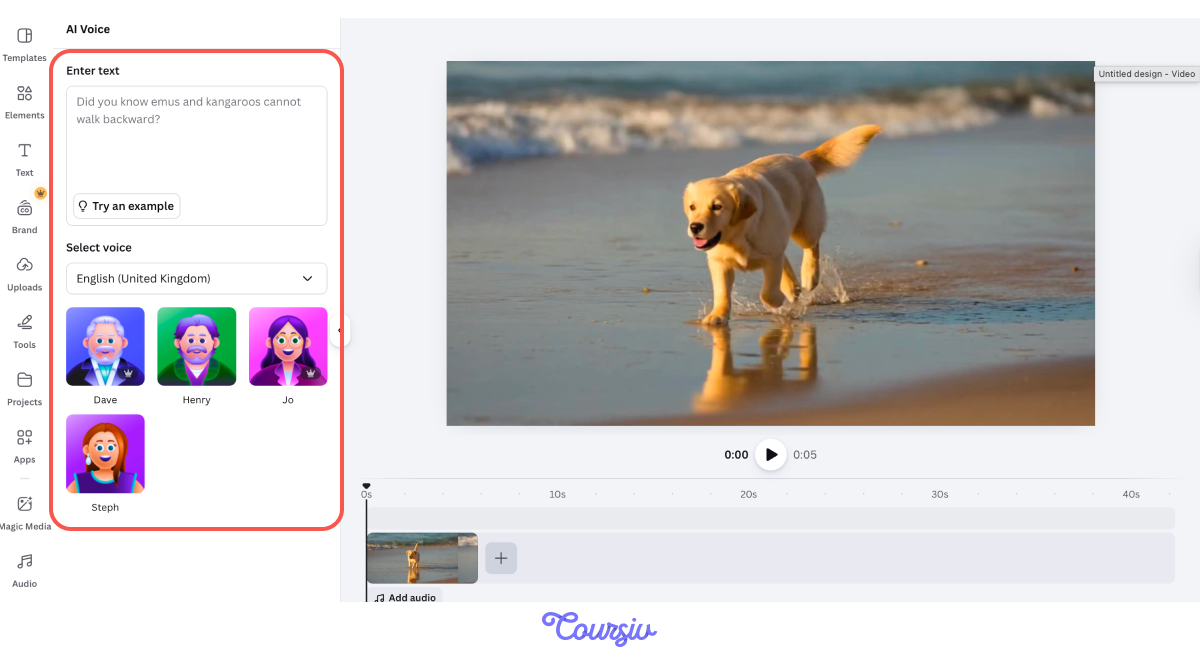
Here's what you've got — an AI-made voiceover laid right over your clip, no recording needed.
You're not locked into one language either. Paste the translated version into the Enter text field, select your language, and Canva generates the voiceover in whichever language you choose. Let's try it in French with a female voice.
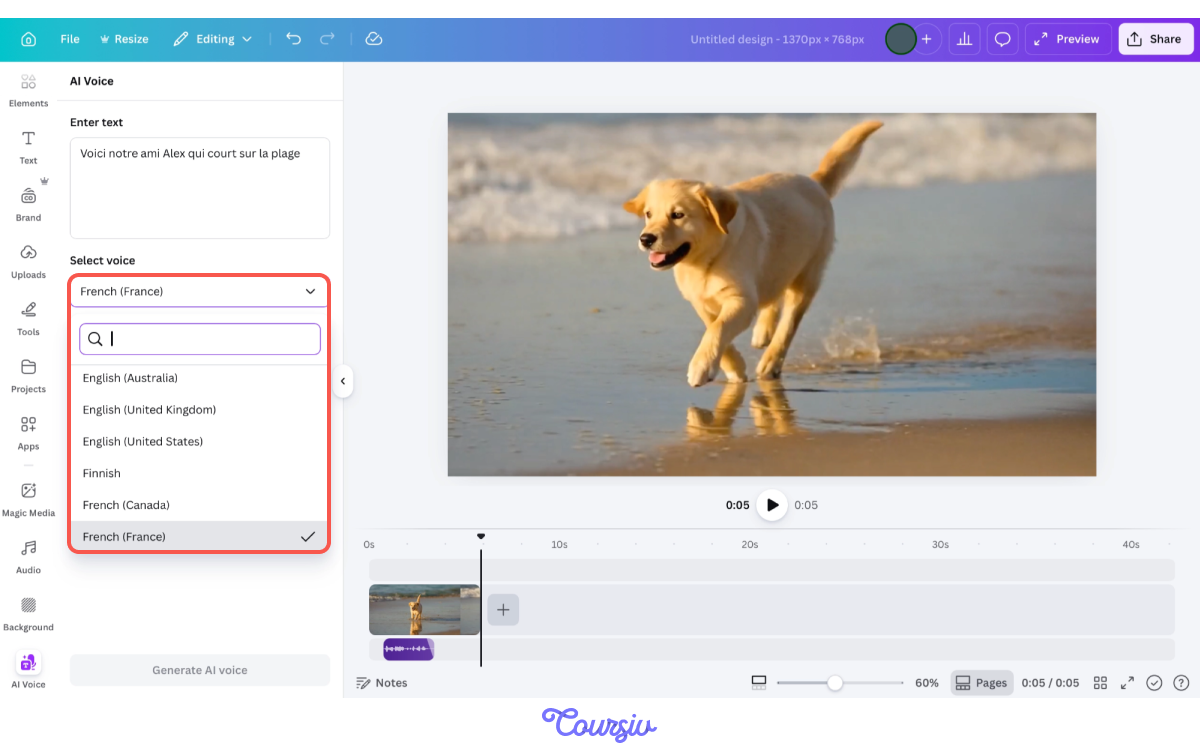
Here's how it sounds after switching to French.
Perfect!
You got all of that from one clip, one script, and one voiceover without ever leaving the editor. Here's the full workflow from start to finish:
- Generate an image in the Image tab.
- Bring it into the Video tab.
- Animate it.
- Add a voiceover.
- Switch to another language.

- A specific prompt beats a vague one: Action, setting, and tone are what turn a generic clip into something intentional.
- Image to Video connects the tabs: Generate an image first, then upload it and animate it directly in the Video tab.
- AI Voiceover generates voice in multiple languages: Type a script, pick a language and voice, and Canva AI syncs it to your clip, no recording or rewriting required.
You've generated clips from text, animated a still image, added a voiceover, and switched it to another language in the Video tab.
In the next lesson, you'll learn how Canva AI handles written content — from a quick caption to a full document.