Kling · Kling's Core Features
Video Generation
Turn ideas and images into moving scenes
Turning Ideas Into Moving Scenes
You already know how to generate images, but you can also animate them in Kling.
In this lesson, you'll learn how to get from a still image to a finished video clip straight from your browser.

Two Ways Into a Video
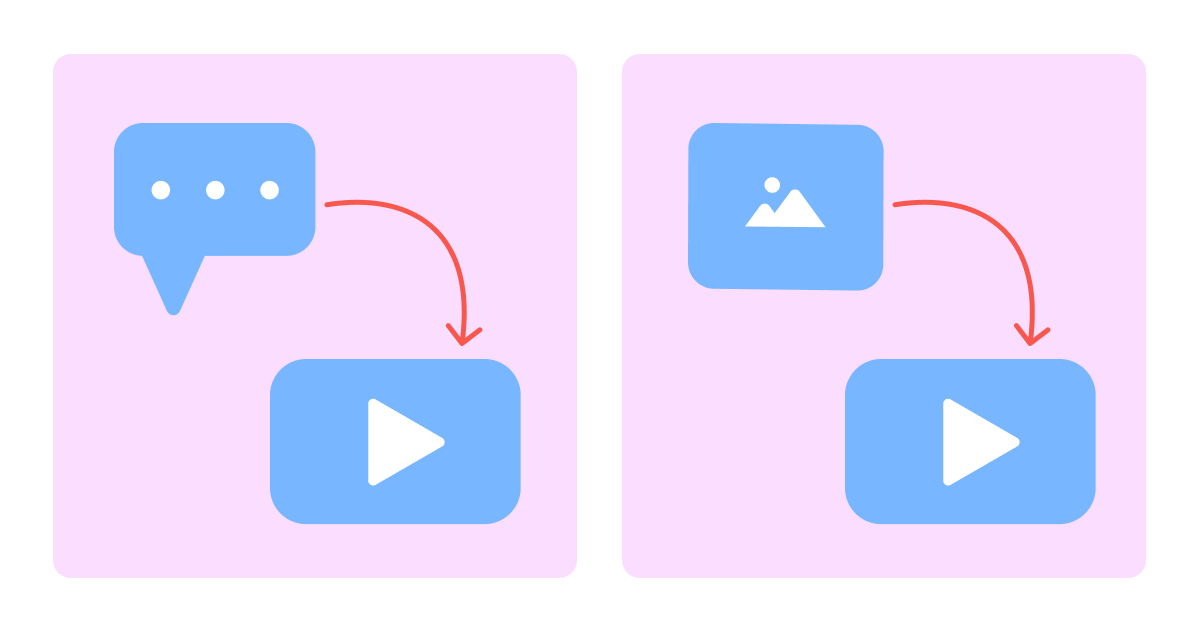
Kling's Video Generation has two entry points:
- Text-to-Video generates a moving scene from a written description. Useful when you're starting from an idea.
- Image-to-Video takes a still image you already have and animates it into a clip. Useful when the composition and lighting are already right, and you just want it to move.
Video Settings
Before you start generating them, there are four settings to configure in Kling:
- Mode
- Length
- Video Ratio
- Number of Outputs
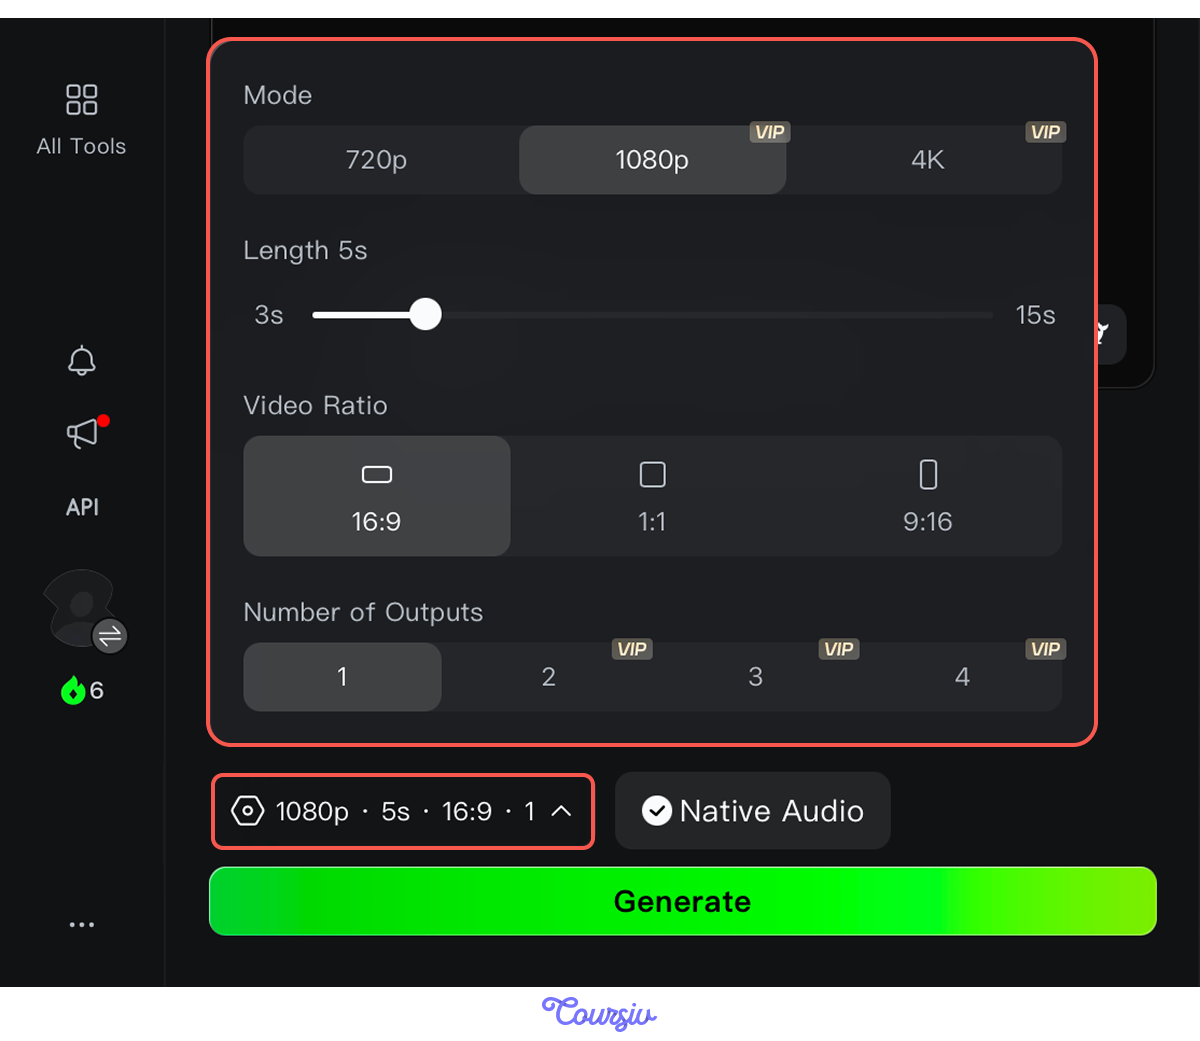
Those settings apply to every generation you run — whether you start from text or an image. You can customize them depending on what the clip needs: a longer duration for a full scene, a shorter duration for a quick cut, a vertical ratio for mobile, or a widescreen aspect ratio for a cinematic feel.
Let's put them to use, starting with a text description.
practice preview
Interactive practice
Fill in the blank
Ask Kling to generate a short video clip from a text prompt.
You've just generated a finished clip from a single text prompt.
Now use an image as the starting point and generate a video from that instead.
Image-to-Video
When you already have a still image with the right composition and lighting, you can animate it directly with an Image-to-Video.
Let's upload the image from the last lesson of a mug and a box, describe the motion you want, and Kling turns it into a moving scene while preserving the original.
practice preview
Interactive practice
Fill in the blank
Fill in the gaps to animate a product image into a short clip.
See how Kling used the reference image as the foundation and kept everything intact: the composition, lighting, product detail, and simply added the motion.
Choose one
You have a product photo with perfect lighting and composition. You need a 10-second video of it for a campaign. What is the most efficient approach?
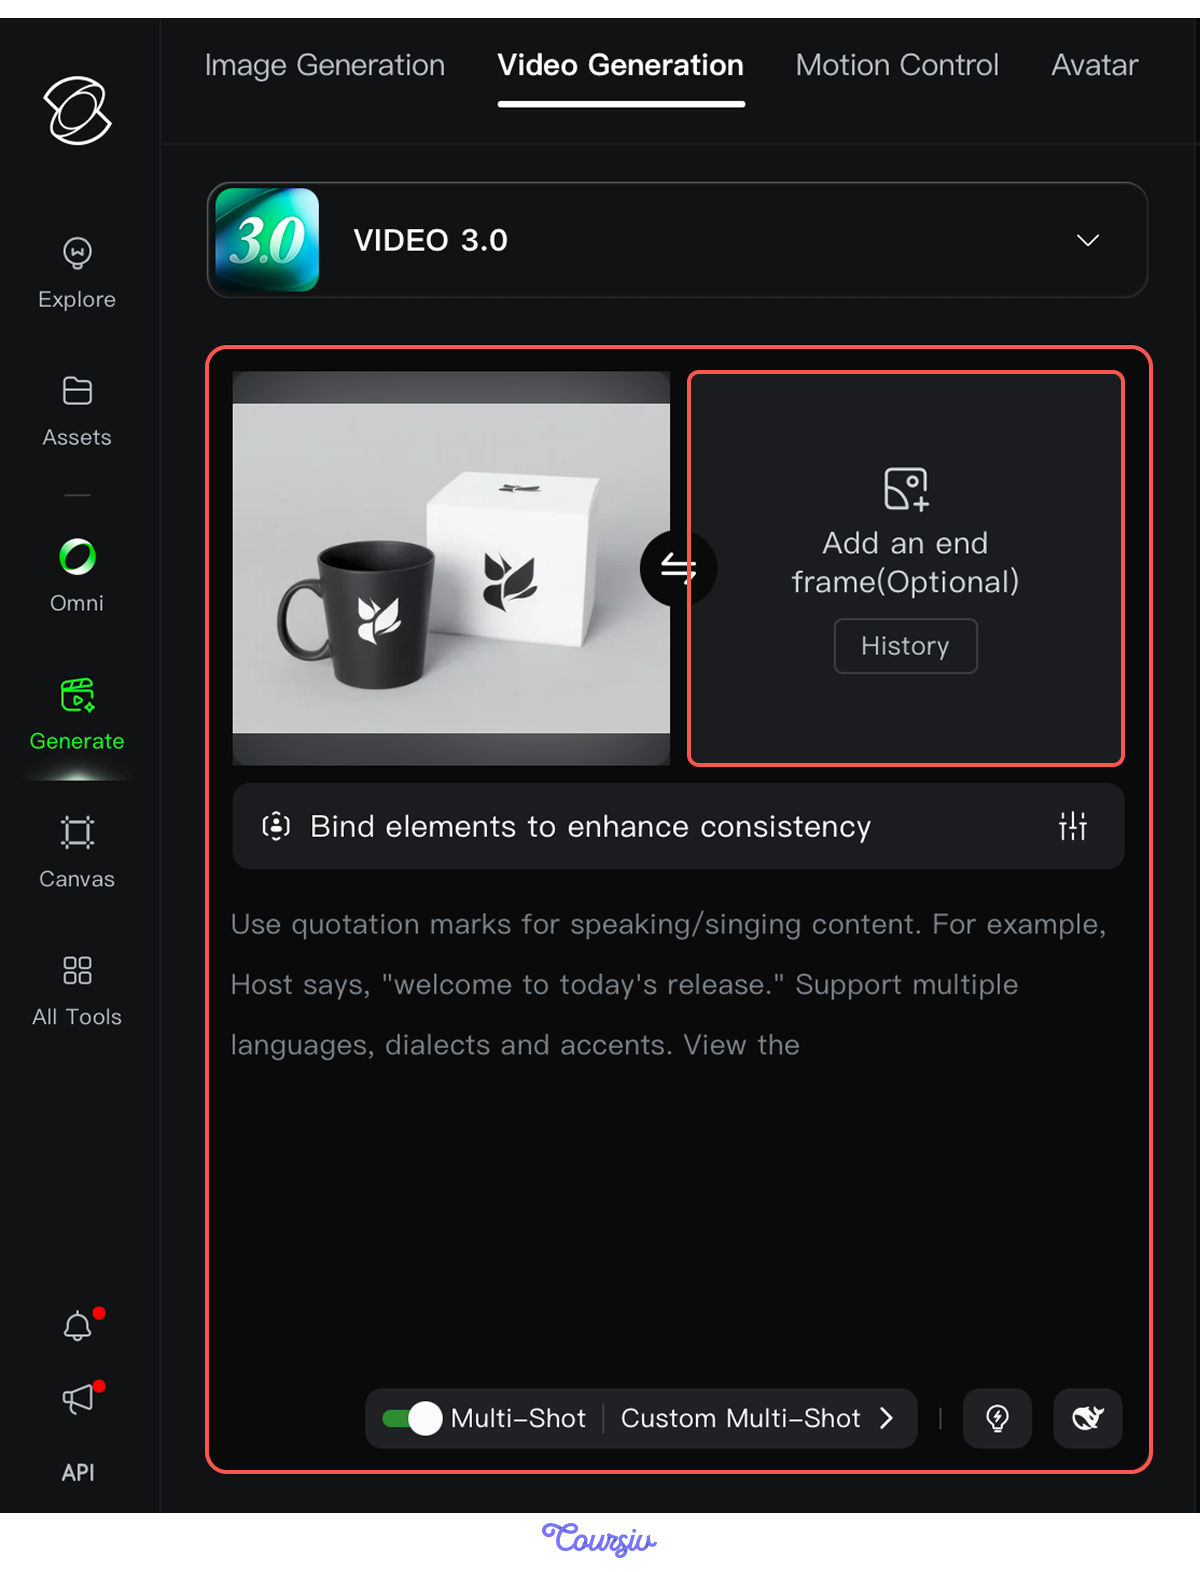
Nice work! Two entry points covered. You can also use a video reference: upload an existing clip to generate a new one. Optionally specify start and end frames to control exactly where the scene begins and ends. Let's see how that works.
Video-to-Video Generation
You have a clip, and now you want to change what's happening in it or how it looks. Video-to-Video takes your existing clip as a reference and generates a new version, keeping the structure and timing while changing the scene, context, or visual treatment.
practice preview
Interactive practice
Fill in the blank
Use the mug and box video you generated and turn it into a product advertisement.
Video-to-Video kept the original and built the scene around it. That's how the product clip became a full advertisement.
The more control you have over the generation settings, the more precise the output becomes.
Remember that the settings you choose directly shape the output: a 3-second clip works for a quick social cut, while a longer widescreen gives you room for a full scene. Let's set a 10-second duration and see what that gives us.
practice preview
Interactive practice
Fill in the blank
Generate a product video with an intentional duration that fits the scene.
There you go — a 10-second clip. You can adjust any of the other settings the same way, depending on what the clip needs.
Next up: deciding how many scenes it will have and what happens in each.
Multi-Shot Mode
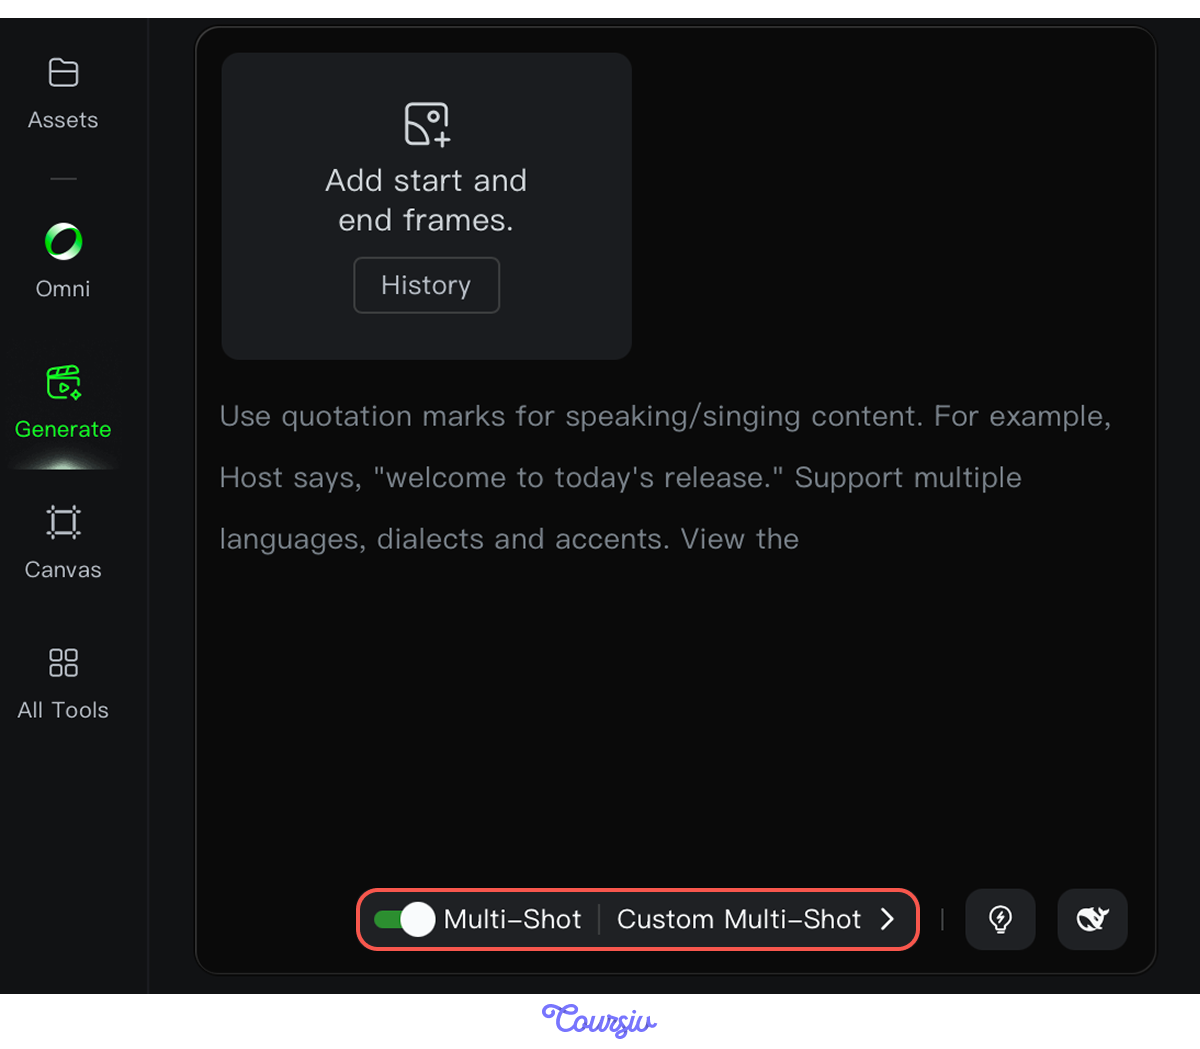
Multi-Shot mode lets you build a video with multiple scenes in a single generation. Enable it, and Kling plans the scene transitions automatically based on your prompt.
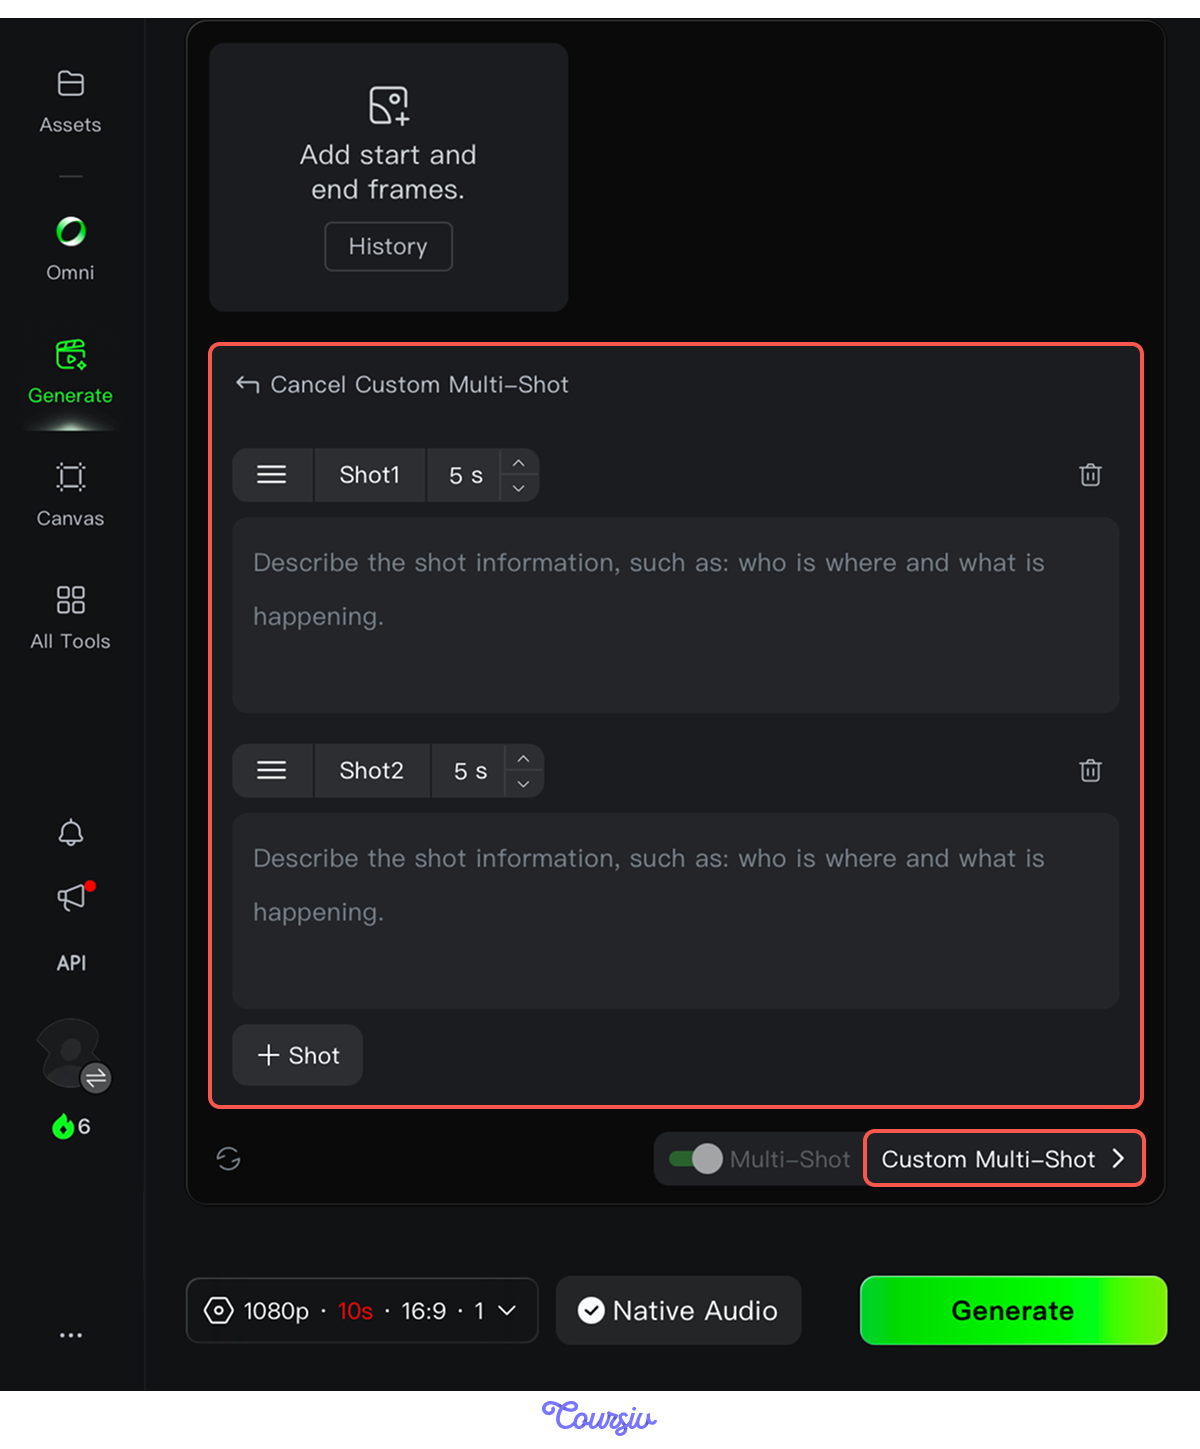
Switch to Custom Multi-Shot to take full control. Specify the exact framing, angle, and transition for each shot yourself.
practice preview
Interactive practice
True / False
Decide if this is a useful case for Custom Multi-Shot.
To build in Custom Multi-Shot, write your prompt for each shot with a duration. You can also easily switch the order if you need. Let's try it with the perfume bottle we did at the start!
practice preview
Interactive practice
Fill in the blank
Generate a three-shot product sequence using Custom Multi-Shot mode from a perfume bottle video.
Excellent!
Each shot followed the instruction you gave it, and the transitions held the sequence together. That's Custom Multi-Shot producing the shot structure of an edited video without an edit suite.
You've gone from a written idea to a directed, multi-shot video sequence — with full control over resolution, duration, framing, and every cut in between.
Every tool in this lesson stacks on the last, and now you have the full picture of what Kling's Video Generation can do.
- Video Settings: Configure resolution, duration, aspect ratio, and output count before generating.
- Text-to-Video: Generate a moving scene from a written description when you're starting from an idea.
- Image-to-Video: Animate a still image directly, with the composition and lighting already set.
- Video-to-Video: Take an existing clip and transform its context or visual treatment while keeping the structure intact.
- Custom Multi-Shot: Define each shot's framing, angle, and transition individually; use it when the brief is precise and the order matters.
You've gone from a text description to a directed, multi-shot video sequence with full control over duration, framing, and movement.
In the next lesson, you'll meet Avatar Generation — turning a single photo into a speaking, moving spokesperson without a camera or a studio. See you there!