AI-Powered Real Estate · Daily Realtor Workflow with AI
Listing Launch Kit
Stage, write, and launch faster
Listing Launch Kit
Your consult system is producing structured plans. Now, a seller has approved the prep plan. You need MLS copy, open house flyers, showing notes, and agent remarks — all ready before the listing goes live.
That's a lot of content to produce from scratch in 48 hours. This lesson turns it into a system. You'll take one property fact sheet and generate every deliverable a listing needs to launch — MLS copy, open house assets, staged visuals, and a project timeline.

What a Listing Launch Kit Is
A listing launch kit is the complete set of deliverables a property needs to go live: MLS descriptions (short and long), feature highlights, photo captions, showing notes, agent remarks, open house materials, social content, and visual assets.
And there is no need to produce them one at a time, from scratch, across different days.
The faster approach is to treat all of these as format variations of the same source material. Your property fact sheet holds the details. AI multiplies those details into every format you need. One input, many outputs, all consistent because they pull from the same facts.
Your Fact Sheet Is the Starting Point
Every prompt in this lesson starts from a property fact sheet. If the details aren't collected and confirmed, the AI has nothing accurate to work with — and you're back to the generic output problem from Lesson 1.
Before you prompt anything, your fact sheet should include: address, beds/baths/sqft, year built, lot details, renovations with dates, school zone, HOA info, pricing, and any seller-specific notes (showing restrictions, pets, occupancy). That's your Intake step for every listing deliverable.
MLS Copy From a Fact Sheet
Once your fact sheet is filled in, the first deliverable it produces is the one buyers see before anything else — your MLS description.
MLS descriptions need to do two things: provide buyers with enough specific detail to decide whether to schedule a showing, and give agents enough context to position the property with their clients.
practice preview
Interactive practice
Fill in the blank
Feed the complete fact sheet and ask for multiple MLS formats in one prompt. Use ChatGPT for speed on short-form drafting.
Excellent!
Three formats, one prompt. The short description works for syndication feeds. The long description is your MLS entry. Agent remarks give buyer's agents the positioning context they actually use. No rewriting from scratch for each one.
Open House Assets From the Same Source
An open house needs its own content set: flyer copy, a social media promo caption, a sign-in conversation script for the door, and a follow-up sequence for attendees afterward. These all come from the same fact sheet — you're just changing the format and audience.
practice preview
Interactive practice
Fill in the blank
Generate open house assets in one prompt. Use ChatGPT for this task.
A Shortcut for Listing Copy: Write.Homes
Write.Homes is a real estate–specific writing tool that generates listing descriptions, social captions, and marketing copy from property details. You enter the facts — bedrooms, features, renovations, neighborhood — and it produces MLS-ready output using language patterns common in real estate listings.
The difference from ChatGPT or Claude is that Write.Homes is pre-trained on real estate formats. You skip the structural instructions ("lead with this feature," "walk through rooms," "close with a call to action") because the tool already knows those patterns.
The tradeoff: less flexibility. For standard listing copy, it's faster. For anything custom — buyer recaps, negotiation scripts, consult plans — you'll still use a general-purpose tool.

Visual Assets — Staging, Enhancement, and Production
Listing photos are the first thing buyers see. AI visualization tools let you stage empty rooms, enhance existing photos, and produce marketing-ready visuals without hiring a physical stager or waiting days for editing turnaround.
The Virtual Staging Workflow
Before you stage anything, decide which rooms need staging and which style best fits the property. Staging every room takes time and credits.
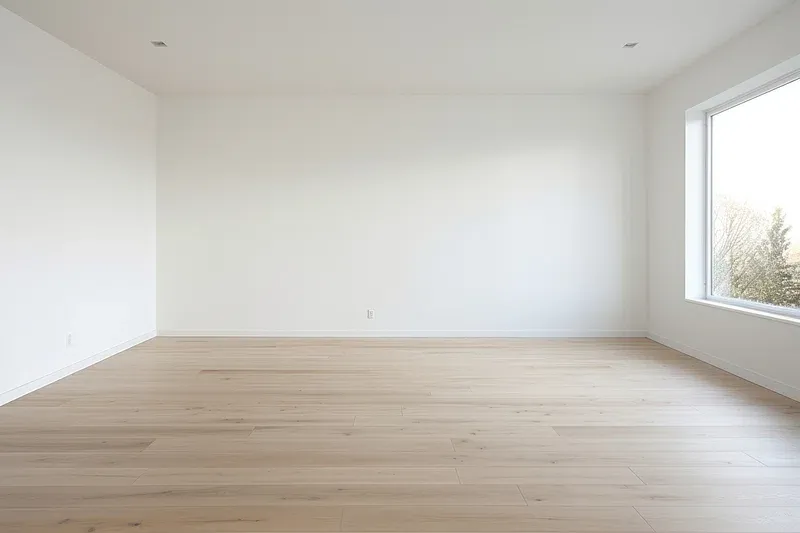
Start with your best photo of the empty room — good lighting, wide angle, no clutter in the frame. Upload it to your staging tool and select the style that matches the property's price point and neighborhood.
For a $485K home in a suburban family neighborhood, modern-neutral works better than luxury minimalist.
practice preview
Interactive practice
Fill in the blank
Use Stable Diffusion to stage your empty room photo.
Review the result. Check that furniture doesn't block windows, overlap awkwardly with walls, or clash with existing fixtures like flooring and countertops. Most tools let you regenerate or swap individual pieces if something looks off.
Save the staged version alongside the original — you'll need both. The original goes into your MLS gallery (some markets require unedited photos to be included), and the staged version goes into marketing materials.
Open House Visuals With Canva
Canva is a design tool that lets you build marketing materials from templates — flyers, social media graphics, email headers, and printable sign-in sheets. You pick a template, swap in your listing photos and copy, adjust colors and fonts, and export.
What makes Canva especially useful is its built-in AI. Instead of starting from a blank template, you can describe what you need and let Canva generate it for you.
Magic Design generates a ready-to-edit layout from a short description or an uploaded image.
Magic Write is Canva's built-in text generator. You can highlight any text box in your design and ask it to rewrite the copy in a different tone, shorten it, or generate new text from a brief description.
Magic Resize duplicates your design and reformats it for a different platform in one click.
The Canva Workflow for Open House Materials
Start with the flyer — it's the most detailed piece, and everything else gets resized from it. You can use Magic Design to generate a starting layout: type a short description like "Open house flyer design, photo-forward, clean layout" and pick the option closest to what you want.
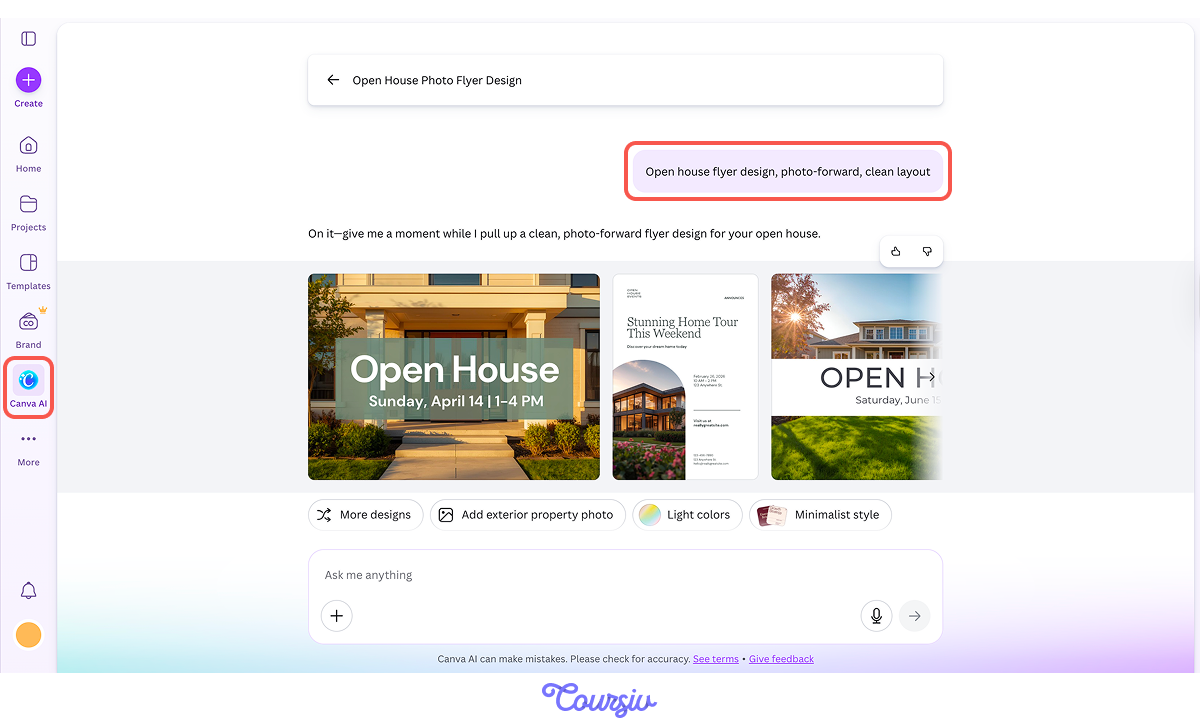
After choosing the best design, you can either keep editing here or proceed to Canva Editor.
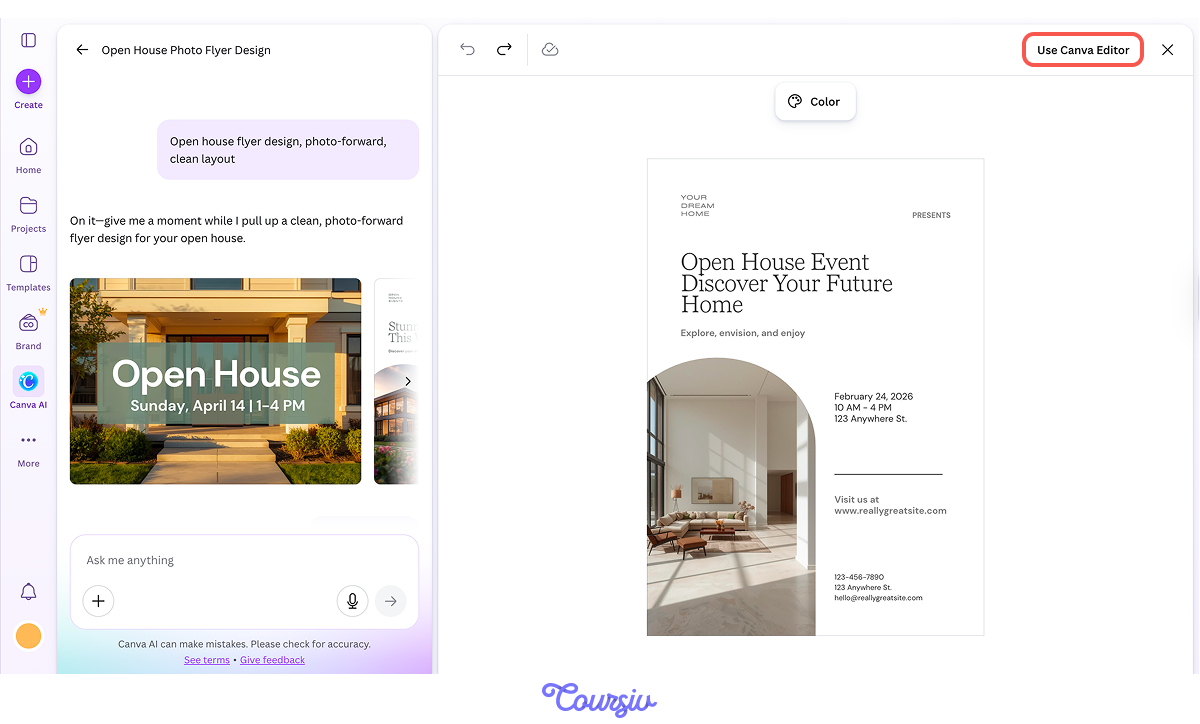
Upload your image of a staged living room, then replace the placeholder text with the flyer copy you generated earlier — headline, three highlights, date, time, and address.
Adjust font sizes so the address and open house date are the largest elements. A buyer driving by should read those two things from a car window.
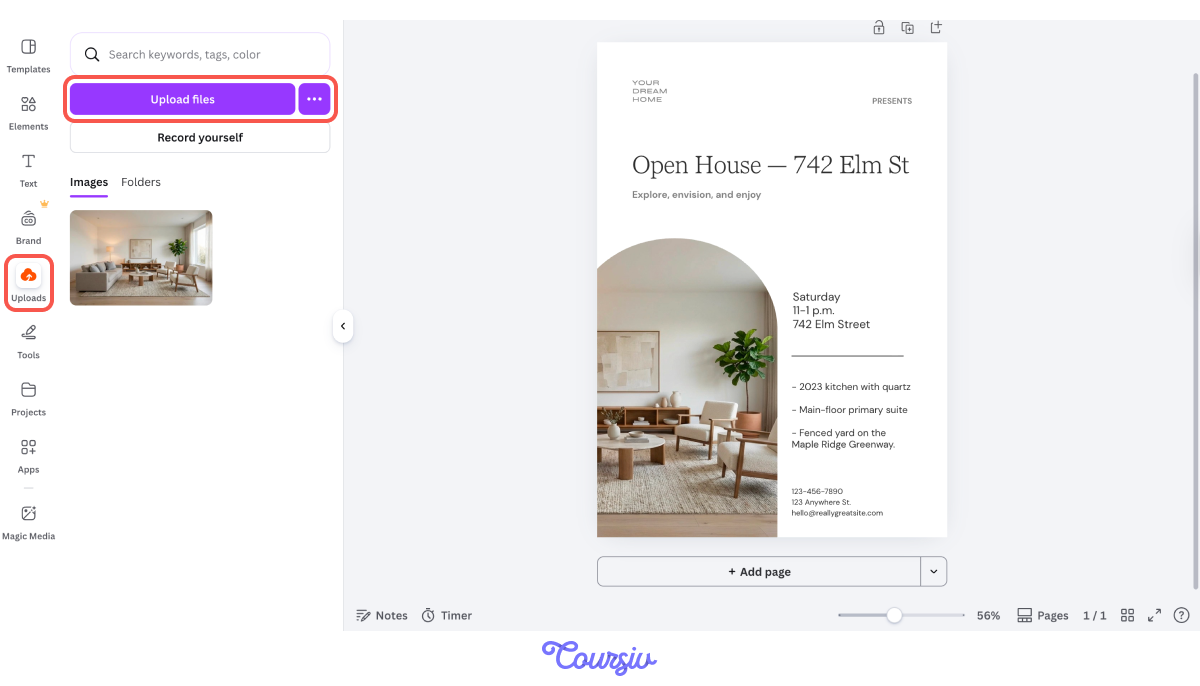
For social graphics, use Magic Resize to duplicate the flyer into Instagram post and story dimensions.
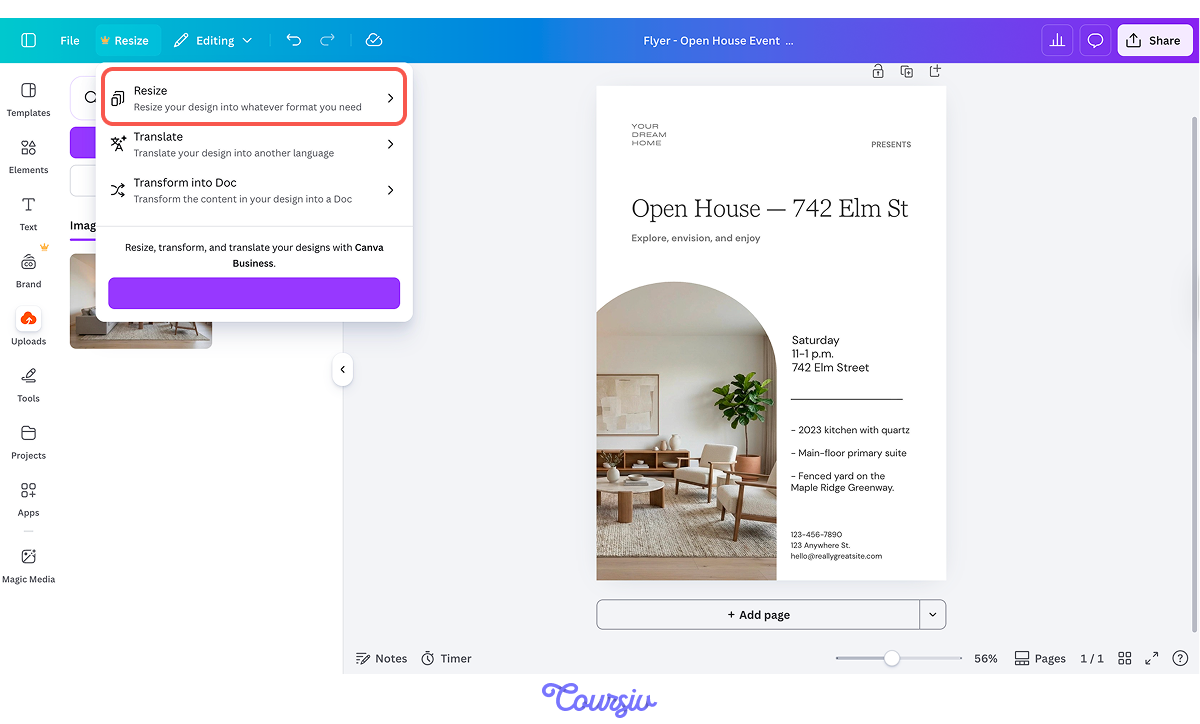
Use Magic Write if you need to adjust copy length to fit the new layout. Export flyers as PDF for print quality and social graphics as JPG for faster uploads.
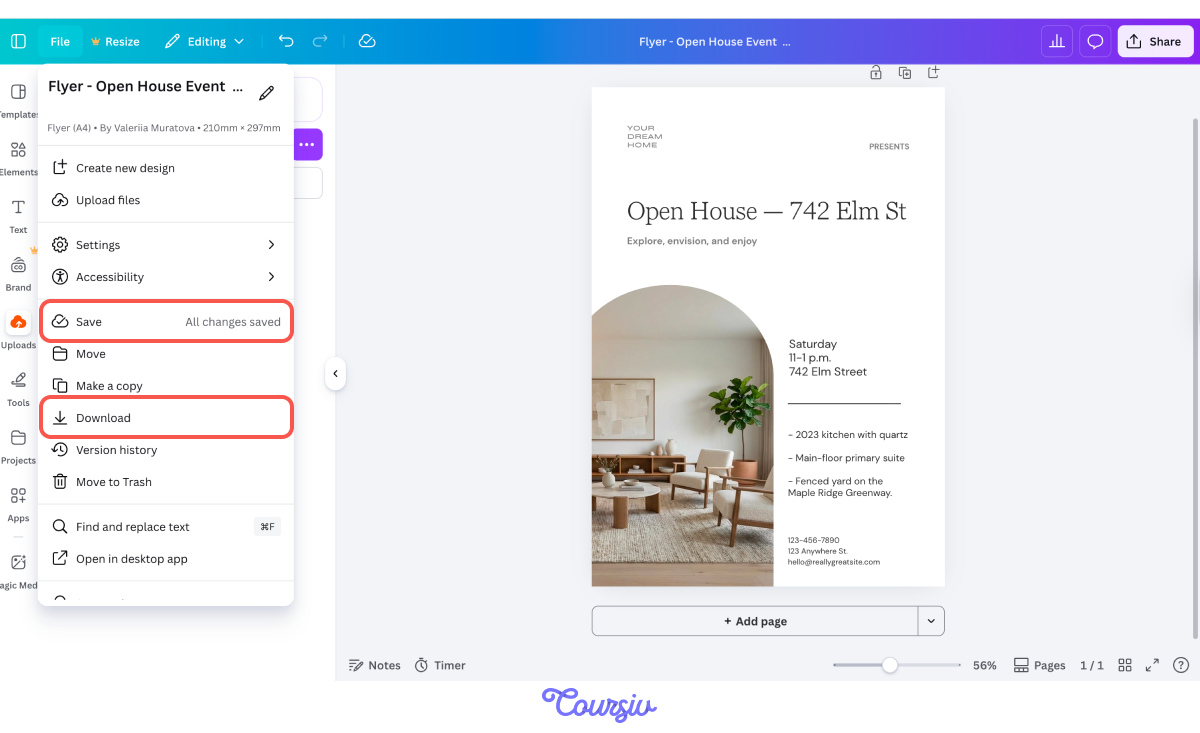
Save the Canva project so you can duplicate it for the next listing — swap photos and copy, keep the layout.
One confirmed property fact sheet produces everything:
MLS copy → Open house assets → Staged visuals → Marketing graphics.
Your fact sheet keeps every output consistent. Your staging plan keeps visual production focused. Canva keeps one design working across every platform. When the source is accurate, every format that comes from it is accurate too.
A Note on Consistency and Compliance
Every piece of content in the launch kit — MLS copy, flyer, social post, agent remarks — should pass the same checks you built in Lesson 1.
Verify property details against the fact sheet. Confirm no features were invented. Check neighborhood language for fair housing compliance. Make sure the pricing, showing rules, and contact information match across every format.
This matters more when you're producing multiple versions from one source.

The Post–Open House Follow-Up
Sign-ins are only useful if they trigger follow-up. You need three sequences: one for attendees who showed buying interest, one for general attendees, and one for neighbors who came to see what's happening on their street. Each gets a different message and a different next step.
practice preview
Interactive practice
Fill in the blank
Build three follow-up messages from one prompt, segmented by attendee type. Each one pushes toward a different next step.
Choose one
Why does segmenting follow-ups by attendee type matter more than sending one polished message to everyone?
What You Built in Unit 1
Over the last four lessons, you assembled a working AI system for the daily agent workflow:
- You have a four-step process (Intake → Draft → Verify → Finalize) with guardrails baked into every template.
- You have a speed-to-lead pipeline.
- You have a consult-to-plan method that turns meetings into buyer plans, seller timelines, and follow-up packs.
- You have a listing launch kit that multiplies one fact sheet into multiple assets.
What's Coming Next
Unit 2 shifts from daily workflows to the decisions and systems that drive long-term results.
Next lesson, you'll build your marketing engine — a weekly brief that produces an entire content calendar in one sitting, without starting from scratch every week.
Let's keep going!