Stable Diffusion · Stable Diffusion Essentials
Fine-Tune Your Image Generation
Discover new features of Stable Diffusion
Your First Steps in Image Generation
You've learned how to craft prompts. Now let's look under the hood!
In this lesson, you'll discover how a few key settings can make your images sharper, more accurate, or more creative.
Crafting Your First Prompt
Let's start with a simple prompt and build from there.
practice preview
Interactive practice
Fill in the blank
Identify the missing part of this image prompt.
Now, let's enhance our prompt by adding a stylistic element, as you did previously. This will make it more specific.
practice preview
Interactive practice
Fill in the blank
Add a stylistic element to the basic prompt to make it more specific.
Style is just one lever you can pull. The model you choose — and the reference images you bring in — can shift your results just as much. Let's look at both.
Choosing Your Model
So far, you've been working with OpenArt SDXL — the default model. But OpenArt gives you access to other Stable Diffusion versions, each with its own strengths.
Choosing the right model is one of the quickest ways to steer your results before you even write a word.
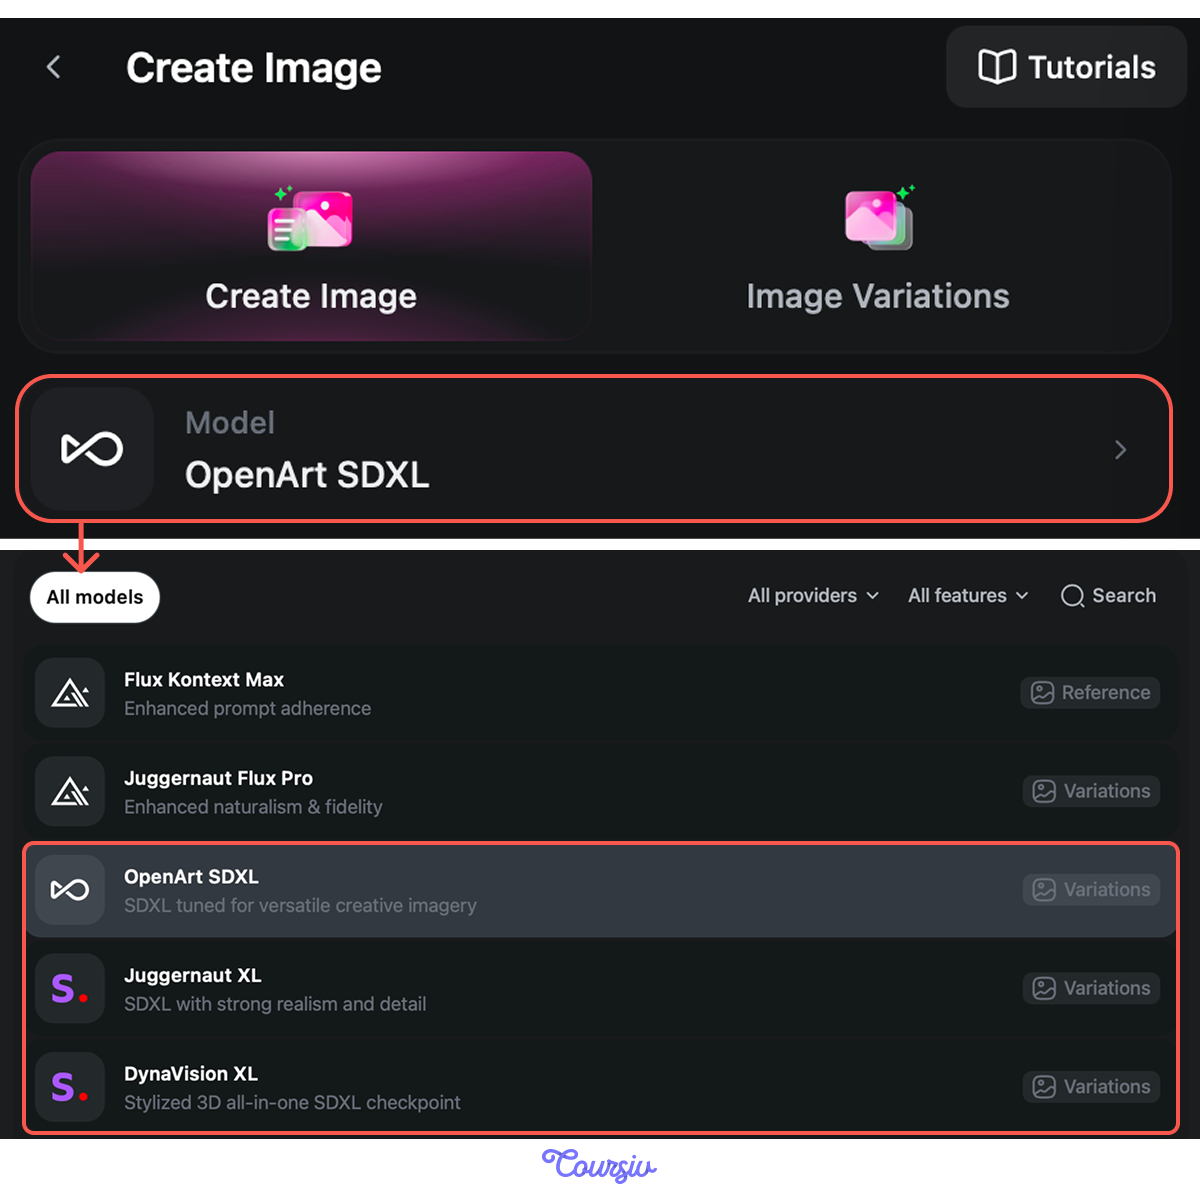
Stable Diffusion Versions
- OpenArt SDXL — the versatile baseline. A solid starting point for most image types.
- Juggernaut XL — built on SDXL with a focus on strong realism and fine detail. Best for portraits, product-style images, and anything where accuracy and texture matter.
- DynaVision XL — a stylized all-in-one 3D checkpoint. Best for illustrated, rendered, or non-photorealistic results with a polished, cinematic feel.
If your prompt is realistic in nature — a person, a place, an object — try Juggernaut XL. If you're going for something illustrated or stylized, DynaVision XL is your starting point.
If you want to explore your options first and create a draft to iterate on later, go for OpenArt SDXL.
practice preview
Interactive practice
prompt fixer
The default model is set to OpenArt SDXL. Choose the model that fits this prompt best.
Prompt From Image
You now know how to pick the model that fits your vision. But what if the vision itself is hard to put into words? That's a different kind of stuck. OpenArt has a feature for it: Prompt from Image in the prompt box.
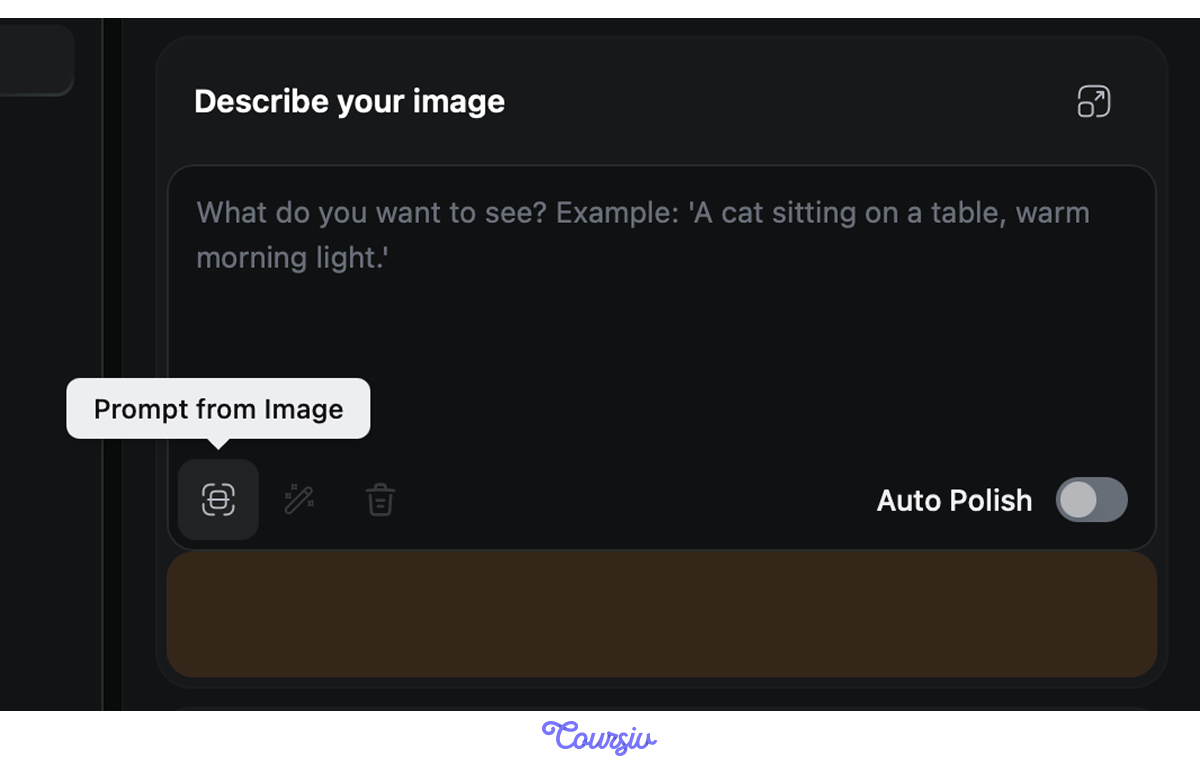
Instead of writing a prompt from scratch, you upload a reference image and Stable Diffusion generates a text prompt that describes it — which you can then use or edit to create something similar.
This is how to use it:
- In the prompt box, click "Prompt from Image"
- Click "Upload" and select an image from your device
- Stable Diffusion will generate a prompt describing the image
- Use that prompt as-is, or tweak it to steer the result in your direction
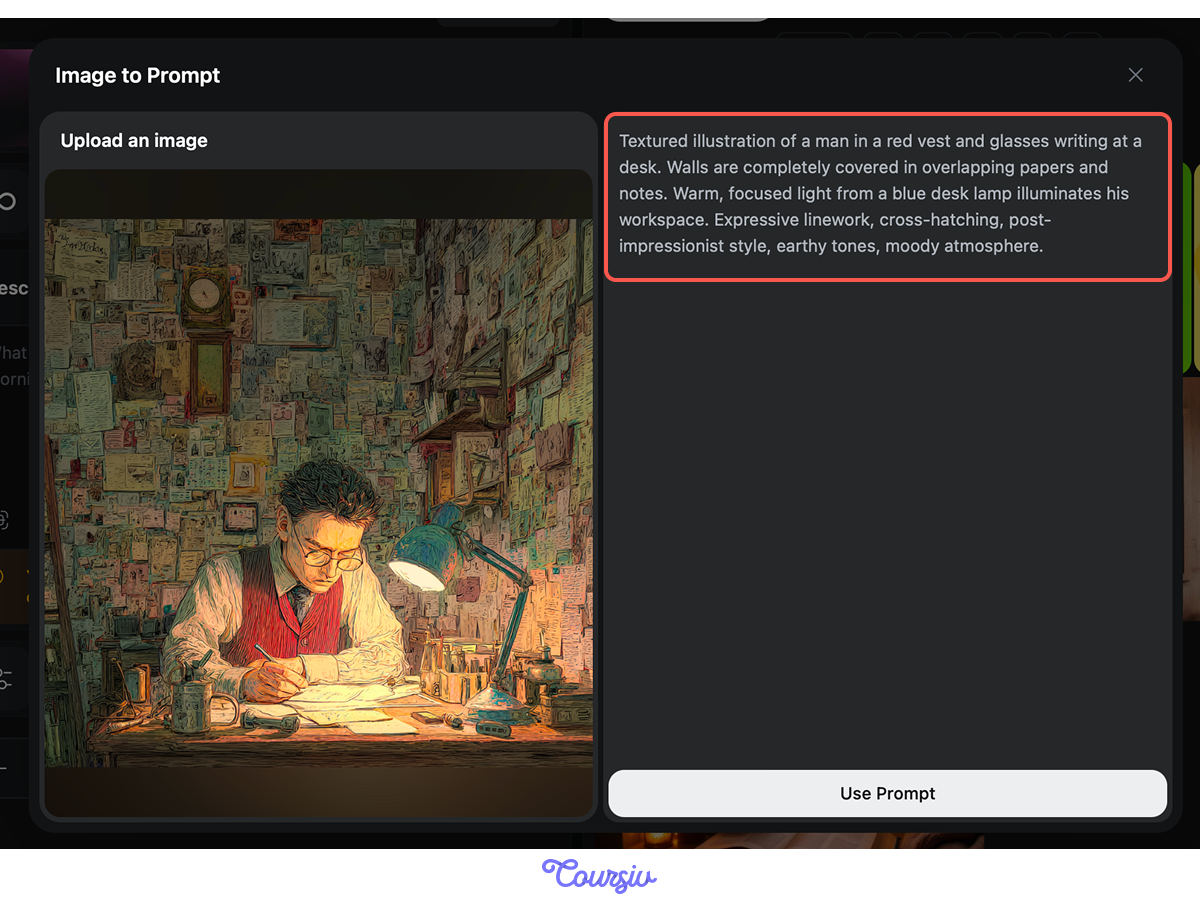
This is your prompt: "Textured image of a man in a red vest and glasses writing at a desk. Walls are completely covered in overlapping papers and notes. Warm, focused light from a blue desk lamp illuminates his workspace. Expressive linework, cross-hatching, post-impressionist style, earthy tones, moody atmosphere."
It's also a great starting point for experimentation. Try swapping out individual elements — the subject, the lighting, the mood — and see how the image shifts.
practice preview
Interactive practice
Fill in the blank
Swap the elements to create a different version of this image.
Swapping elements in a prompt gives you creative control. But there's another kind of control that works in the opposite direction — not adding what you want, but removing what you don't.
Negative Prompts
Negative prompts help you exclude unwanted elements, styles, or colors from your image.
Some of the most commonly used negative prompt terms in Stable Diffusion are:
- blurry, low quality — to avoid soft or degraded outputs
- extra limbs, deformed hands — to reduce anatomical errors in portraits
- neon colors, oversaturated — to keep color palettes controlled
- photorealistic — to steer away from realism when you want illustration
Let's see the difference negative prompts make in practice. First, without any restrictions.
practice preview
Interactive practice
Fill in the blank
Complete the prompt to create a futuristic city image with no negative prompt.
practice preview
Interactive practice
Fill in the blank
Now, add negative instructions to see the difference
See the difference? The second image avoids the neon aesthetic entirely.
Negative prompts give you more control by filtering out elements that don't fit your vision.
Now let's put model choice and negative prompts together.
practice preview
Interactive practice
True / False
Which model would you use for this task?
practice preview
Interactive practice
True / False
Now, will this negative prompt be useful to keep the illustration style consistent?
What's Next?
Great job! In this lesson, you covered a lot of ground: building and enhancing prompts, choosing the right model for the job, reversing a prompt from an image, and using negative prompts to filter out what doesn't belong.
Next up — samplers. You'll learn how they influence how Stable Diffusion processes your prompt and how to use them to get even more consistent, intentional results.